


Yoyodyne Slipper Clutch 37 Degree Kawasaki ZX6R 13-24
$1,249.00
Description
ZX6 slipper clutch with the normal ramp angle. Suggested for aggressive street riding, track days and club racing.
To fit this clutch to the 636, you need Kawasaki spacer # 92026-0139 (Included in kit)
- Includes Nut needed for installation on all 2013+ ZX6R
Installation:
18703 Antihopping clutch kit ZX6R 13-24 – mounting instructions
Congratulation, you bought one of the best clutch systems for your ZX6R.
This clutch shoul dbe installed by an experienced Kawasaki service center, or experienced mechanic.
- Read this instruction with photos before you start. Check if the kit includes all parts.
- Remove the old clutch ( according Kawasaki workshop manual ), clean the thread on the shaft of old glue perfectly. Clean these parts with brake cleaner.
- Check if the original spacers between bearing and clutch drum are in position ( pic.a)
- Confirm the steel balls are in their pockets. Use two clutch springs and upper spring retainers to clamp both parts of clutch drum together. ( pic. b )
- Install the clutch to gearbox shaft ( pic. c )
- The kit includes small parts for mounting. Mount spring washer ( pic d ), spider spring ( pic.e ) and main nut ( pic.f ). Nut torque moment 120 Nm ( pic.g ), use glue Loctite No. 620 (RED) to secure.
- Remove the two springs with retainters.
- Install clutch plates . This kit is designed for STD clutch plates. Correct thickness of clutch plates pack is 40.0mm, for which is this clutch designed. Due to manufacturing tolerances, this total thickness is not always 40mm. If the thickness is different, you can correct this thickness with help of different thickness of steel plates:
Catalog No. Thickness
13089-0008 2.3mm
13089-0009 2.6mm ( standard)
13093-1093 2.9mm
Don´t install friction the plate with larger inside diameter with two steel rings if possible ( pic. j), but rather use all normal friction plates. If this is not possible, never mount this special friction plate onto first position. Install a normal friction plate and steel first. ( pic.k ). Then install the special fricton plate with judder springs. Finish the pack as normal.
- Mount the pressure plate with pull-rod ( pic.l ). Install clutch springs with kit buckels ( pic.m,n ) and M5 kit bolts ( torque 8 Nm ).
- Check the clearance between pressure plate and clutch hub via the holes in the pressure plate. The correct clearance is about1.0 mm. This clearance can be corrected according to step 8. When clutch plates wear and the clearance is reduced to 0.50mm replace all friction plates to with new ones.
- Install clutch cover according Kawasaki workshop manual, adjust clutch cable and go back to track.
LIST OF PARTS
1 pc. clutch drum lower side
1 pc. clutch drum upper side
1 pc. presure plate
6 pcs. steel ball
1 pc. curved washer
1 pc. spider spring
1 pc. nut
6 pcs. spring retainer
6 pcs. spring retainer + preload ( green )
6 pcs. spring retainer + even more preload ( black )
6 pcs. M5 bolt
You may also like…


Related products
-

Yoyodyne Spring Set Kawasaki ZX6R 13-24
$30.00 Add to cart -
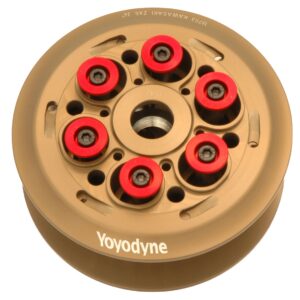
Yoyodyne Slippper Clutch 34 Degree Kawasaki ZX6R 13-24
$1,249.00 Add to cart -

Stompgrip Volcano Profile Traction Pad Tank Kit ZX6R 09+
$64.99 Select options This product has multiple variants. The options may be chosen on the product page -

Zero Gravity Race Windscreen – ZX6R
$119.95 Add to cart